
Skip to content

Nano Tip vs Micro Link vs Keratin Bond: Which Strand Method Belongs in Your Hair?

Quick answer

In the nano tip vs micro link comparison, both clamp hair inside a silicone-lined bead with no heat or glue, but a nano bead is roughly 90% smaller, so it hides in finer hair. Keratin bond strands are heat-sealed instead, hold up to three months, and are removed rather than moved up.

Three strand-by-strand methods keep coming up when you start researching semi-permanent extensions, and the names do a poor job of explaining the difference. One of them attaches with a tiny metal ring. One attaches with a slightly larger ring. One melts. That single choice decides how flat your extensions sit, how often you are back in the chair, and whether your own hair can carry the weight comfortably. Here is what actually separates them.

How strand-by-strand extensions actually work

All three of these methods build length and thickness the same way: one small strand of hair at a time, attached near the root, repeated in rows across the head. That is the opposite of a weft or a tape-in, which adds hair in wider pieces. Strand methods take longer to apply and they cost more in chair time, but they move like your own hair because the hair is distributed in small increments rather than in panels.

The three differ in exactly one respect: what holds the strand on. Nano tip and micro link both use a silicone-lined ring that gets clamped flat. Keratin bond uses a piece of solid keratin that gets melted with a heat tool. No heat and no adhesive touch your hair in the bead methods. The bond method involves both heat and a fused attachment point.

One thing to settle before you go further. None of these is a DIY install. Tape-ins, nano tips, U-tips and wefts all get applied by a trained stylist, and that is not a sales line, it is a tension and sectioning problem. A bead clamped in the wrong spot or a section that is too small for the weight of the strand is how people end up with breakage. If you do not have a stylist yet, Superior Hair keeps a directory of salons that stock and install our hair.

New to semi-permanent hair?

If you are still deciding between strand methods and wefts, it helps to see the professional lines together before you commit to one attachment type.

Browse the semi-permanent professional range →

Nano tip extensions explained

A nano tip is a single strand of hair, about 1 gram, with a small clear flexible tip molded onto the top. Your stylist threads a section of your own hair through a silicone-lined nano bead, slides the tip in behind it, and clamps the bead flat. Nothing melts and nothing sticks.

The number that matters is the bead size. A Superior Hair nano bead measures 3.0 x 1.5 x 2.0 mm, which is around 90% smaller than the ring used in a traditional micro bead or I-tip system. That is the entire reason the method exists. In fine or fair hair, a larger ring reads as a row of bumps when the light hits the part line. A nano bead sits close enough to disappear.

Our nano tips come in packs of 25 strands, 25 grams per pack at 1 gram per strand, in 18 inch and 22 inch, across 32 shades of 100% Remy human hair with the cuticle intact and running in one direction. A stylist moves them up every 6 to 10 weeks as your hair grows, which means the same hair gets reapplied several times before the ends wear enough to replace. If you want the full method breakdown, we wrote a complete guide to nano tip bead extensions that covers sectioning and row placement in more detail.

Micro link goes by several names, and the name confusion is most of why this comparison is hard to research. Micro link, micro bead, micro ring and I-tip all describe the same idea: a strand tipped with a small I-shaped or flat end, threaded into a bead alongside your own hair, then clamped. It is the older sibling of the nano tip and it works on exactly the same principle.

The difference is scale. A standard silicone-lined micro bead measures 5.0 x 3.0 x 3.0 mm against the nano bead's 3.0 x 1.5 x 2.0 mm. That extra millimeter in each direction sounds trivial written down and is very visible in a low ponytail. A larger bead does hold a heavier strand and gives the stylist more grip, which is why micro link never disappeared, but in thin or light-colored hair it is harder to conceal.

Worth being straight about: Superior Hair stocks micro beads as an installation tool, in five shades to match your root, but our strand hair is made as nano tips rather than I-tips. We took the view that for most clients the smaller bead is the better answer, and the ones who need more grip are usually better served by a weft or a bond. If your stylist works specifically in I-tip, our beads will fit their workflow, and the nano tip range is the closest equivalent in hair.

Keratin bond extensions explained

Keratin bond extensions, also sold as hot fusion or U-tip, replace the bead with chemistry. Each strand carries a U-shaped piece of solid keratin at the top. Your stylist threads your hair through the open curve of the U and closes the bond with a heated fusion connector, set to the temperature the tool manufacturer specifies for keratin. The result is a small, smooth, teardrop-shaped attachment that flexes with the hair.

Our hot fusion U-tip extensions run 1 gram per strand, 25 strands per 25 gram pack, and an average full head takes 4 to 6 packs, which works out at roughly 100 to 150 bonds. That is a long appointment. In exchange you get the longest wear of the three: up to three months, with most sets coming out at 10 to 12 weeks depending on how fast you grow and how well you look after them.

The catch is that bonds are not moved up. A bead can be opened, slid back to the root and re-clamped. A keratin bond cannot. The whole set is removed with an alcohol-based keratin bond remover and removal pliers, and then reapplied, so every maintenance visit is close to a full appointment again. Your stylist should never pull against resistance during removal. Our walkthrough on hot fusion U-tips from application to removal covers the prep and the removal sequence properly.

Nano tip vs micro link vs keratin bond side by side

  Nano tip Micro link / I-tip Keratin bond (U-tip)
Attachment Silicone-lined bead, clamped Silicone-lined bead, clamped Keratin melted with a heat tool
Attachment size 3.0 x 1.5 x 2.0 mm 5.0 x 3.0 x 3.0 mm Small keratin teardrop
Heat or adhesive Neither Neither Heat at application
Strand weight 1 g, 25 strands per pack Around 1 g, varies by brand 1 g, 25 strands per pack
Maintenance Moved up every 6 to 10 weeks Moved up on a similar cycle Removed and reapplied at 10 to 12 weeks
Best for Fine to medium hair, visible part lines, updos Medium to thick hair that can hide a larger bead Medium to thick hair, longest uninterrupted wear
Watch out for Beads clamped too tight or too near the scalp Bead showing at the part in light hair Rushed removal, matting left unchecked

Not sure of your shade?

Method matters less than match. A perfectly installed set in the wrong tone still reads as extensions, so pin the color down before you book.

Get color matched

Which method suits your hair

Start with density, not with preference. Your own hair has to carry every strand you add, and the honest answer is that the method should follow your hair rather than the other way around.

If your hair is fine or your part shows

Nano tip, almost every time. The 90% size reduction in the bead is doing real work here, and a smaller attachment also means less leverage pulling on each section. Fine hair is also where a badly chosen method shows up fastest, so the smallest possible attachment point is the safe default.

If your hair is thick, coarse or grows quickly

Keratin bond earns its place. Thick hair hides the bond easily, carries the weight without complaint, and benefits from the longer stretch between appointments. Micro link is also comfortable here if your stylist prefers beads, since dense hair conceals the larger ring that fine hair cannot.

If you color your hair often or use a lot of heat

Lean toward a bead method. Beads can be opened at the root, which makes a color appointment much simpler than working around 150 fused bonds. Heat-sealed bonds and regular hot tool use also ask more of your aftercare discipline, since heat has to stay off the bond line.

If you are not sure a strand method is right at all

That is a fair conclusion to reach. Strand methods are the slowest and priciest to install, and plenty of people get a better result from a weft or a tape-in. If you mainly want thickness rather than a fully customized blend, seamless tape-in extensions deliver a similar flat finish in a fraction of the chair time. Not every head needs 150 individual strands.

Upkeep, aftercare and the real time cost

Over a year, the bead methods and the bond method land in very different places. Nano tips get moved up every 6 to 10 weeks, and a move-up is shorter than a fresh install because the hair is already yours. Keratin bonds come out at 10 to 12 weeks and go back on from scratch, so each visit is close to a full application. Fewer appointments, longer appointments.

Aftercare splits along the same line. With nano tips, keep hot tools below 350°F, use heat protection, brush with a loop or soft bristle brush working from the ends upward, wash with sulfate-free product and never go to bed with wet hair. With keratin bonds, add a stricter first 48 hours: keep the hair completely dry, then use a sulfate-free and oil-free shampoo kept off the bond line, condition from the mid lengths down only, and keep hot tools off the bonds themselves.

Damage, when it happens, is nearly always a fitting or a scheduling problem rather than a method problem. Sections that are too small for the weight of the strand, attachments set too close to the scalp, beads clamped too tight, matting left unchecked and skipped move-ups are the usual causes. Our hair care guide walks through the washing and brushing routine that keeps a set wearable through several reapplications.

Ready to talk nano tips with your stylist?

32 shades of 100% Remy human hair in 18 and 22 inch, on the smallest bead we make.

Shop nano tip extensions →

Frequently asked questions

What is the difference between nano tip and micro link extensions?

Nano tip and micro link use the same clamping principle with no heat or adhesive, but the bead size differs sharply. A Superior Hair nano bead measures 3.0 x 1.5 x 2.0 mm, around 90% smaller than a traditional micro bead at 5.0 x 3.0 x 3.0 mm. Nano tips hide better in fine or light hair, while micro link suits denser hair.

Do nano tip or keratin bond extensions damage your hair?

Applied and removed correctly, neither method should damage healthy hair. Problems come from fitting and timing: sections too small for the weight of the strand, attachments set too close to the scalp, beads clamped too tight, matting left unchecked, skipped move-ups, or a rushed removal. This is why both methods are stylist-applied rather than DIY.

How long do keratin bond extensions last compared to nano tips?

Keratin bonds wear up to three months, with most sets removed at 10 to 12 weeks. Nano tips are moved up every 6 to 10 weeks instead, so you return sooner but for a shorter appointment. Bonds cannot be moved up, so each keratin maintenance visit means a full removal and reapplication.

Can I install nano tip or micro link extensions myself?

No. Nano tips, micro link, U-tips and wefts are all professional applications. Correct sectioning, bead tension and distance from the scalp decide whether a set is comfortable and safe, and those are trained judgments. Clip-ins and halos are the methods designed for fitting at home with no appointment.

How much hair do I need for a full head?

Superior Hair nano tips and U-tips both come as 25 strands per 25 gram pack at 1 gram per strand. An average full head of hot fusion U-tips takes 4 to 6 packs, roughly 100 to 150 bonds. Your stylist will confirm the count at consultation, since density, length and the look you want all shift the number.

Does Superior Hair sell micro link extensions?

We stock silicone-lined micro beads in five root-matching shades as an installation tool for I-tip and weft work, but our strand hair is made as nano tips rather than I-tips. The nano tip range is our closest equivalent in hair, built on the smaller bead for a flatter, better concealed result.

 

Superior Hair Blog

Why Invest in Quality Hair Extensions? Long-Term Benefits Explained

Why Invest in Quality Hair Extensions? Long-Term Benefits Explained

When it comes to hair extensions, not all are created equal. While it’s tempting to go for the cheaper options, investing in high-quality hair extensions is one of the best choices you can make. It’s more than just about adding length or volume—it’s about achieving a long-lasting, natural look that’s easy to maintain. Here’s why quality hair extensions are worth every penny. 1. They Look and Feel Natural One of the biggest reasons to opt for quality hair extensions is that they blend naturally with your real hair. Premium extensions, made from real human hair, match your hair's texture, movement, and shine. Whether you're adding volume or length, they’ll look and feel like your own hair, giving you a flawless, natural look that’s hard to distinguish from your real locks. 2. They’re Durable and Long-Lasting Quality hair extensions can stand the test of time, unlike cheaper alternatives that tend to wear out quickly. With proper care, high-quality extensions can last for months, even years! They’re less likely to shed, tangle, or break, meaning you’ll get much more wear out of them without needing to replace them frequently. 3. They Can Be Styled Like Natural Hair One of the best things about top-tier extensions is their versatility. You can style them just like your own hair—curl, straighten, or even color them without worrying about damage or them losing their integrity. Whether you want sleek, straight strands or voluminous curls, quality extensions give you the freedom to experiment with different styles. 4. They Won’t Damage Your Natural Hair Unlike cheap synthetic options, quality hair extensions made with real human hair are processed with care and are much gentler on your hair and scalp. They don’t cause the same kind of breakage or tension that cheap extensions often do, which means your natural hair remains healthy, strong, and beautiful. 5. They Save You Time With the right extensions, you can achieve a fuller, longer look in a fraction of the time it would take to grow your hair naturally. Quality extensions also require less effort to style, giving you more time to enjoy your day while still looking amazing. 6. They’re a Smarter Investment While high-quality extensions may have a higher cost upfront, they’re actually more cost-effective over time. You won’t need to replace them as frequently, and the long-lasting, natural look they provide means you won’t need to spend extra on hair styling products or salon visits to maintain the illusion of healthy, luscious hair. 7. They Boost Your Confidence At the end of the day, the most important reason to invest in quality hair extensions is the confidence they bring. When your hair looks fabulous, you feel fabulous too. With extensions that look natural and blend perfectly with your own hair, you'll feel more confident, whether you're at work, out with friends, or on a special occasion. Investing in high-quality hair extensions isn’t just about getting that temporary beauty boost; it’s about choosing a long-term solution for stunning, healthy hair. With natural looks, styling flexibility, and durability, quality hair extensions are worth the investment. Treat yourself to the luxury of premium quality hair extensions from Superior Hair and enjoy a stunning, confidence-boosting transformation that lasts!

Learn more
Hair Extension FAQs: Everything You Need to Know Before Your First Set

Hair Extension FAQs: Everything You Need to Know Before Your First Set

Hair extensions are the secret sauce behind some of the most enviable looks, giving instant length, volume, and style versatility. If you’re thinking about getting hair extensions for the first time, it’s only natural to have a few (or a lot of) questions. Let’s answer some of the most frequently asked questions to help you understand hair extensions better.   1. What Are the Different Kinds of Hair Extensions? Clip-ins: Great for beginners, these are temporary extensions that you can clip in and out yourself. Tape-ins: Semi-permanent, thin wefts applied with tape adhesive—lasts 6-8 weeks. Pre-bonded extensions: Fusion or keratin extensions that bond to your hair for up to 4 months. Wefts (sewn-in): Ideal for thicker hair, they’re braided in and sewn onto your natural hair. Pro tip: Start with clip-ins if you’re new to extensions—they let you test out the look without a big commitment! 2. How Long Do Hair Extensions Last? This varies based on type and care. Clip-ins can last a year or more with proper care, while semi-permanent options like tape-ins and bonded extensions last a few months, depending on maintenance. Investing in quality extensions (like human hair) and taking care of them will prolong their lifespan. 3. Can You Wash Hair Extensions? Absolutely! Washing your extensions is essential to keep them looking fresh, but it’s different from washing your natural hair. Use sulfate-free shampoos and conditioners, and be gentle. Over-washing can strip extensions of their lustre, so keep it to about once a week for semi-permanent extensions and every 10-15 wears for clip-ins. 4. Will Hair Extensions Damage My Natural Hair? Extensions, when applied and maintained correctly, should not damage your hair. Opt for professional application, especially with tape-in or bonded types, and avoid wearing hair extensions that are too heavy, as these can put strain on your roots. Giving your natural hair breaks between installations also helps keep it healthy. 5. How Do I Style Hair Extensions? Most human hair extensions can be styled just like your own hair—curl, straighten, and even color! But remember, excessive heat can shorten their lifespan, so use heat protectant spray. 6. How Much Can Hair Extensions Cost? Hair extension prices vary depending on the type, quality, and length. Clip-ins generally cost less (around $100-$300), while high-quality tape-in or bonded extensions can range from $300 to $1,500, including application. Human hair extensions are pricier than synthetic ones, but the investment pays off in durability and natural appearance. 7. Can I Dye Hair Extensions? Human hair extensions can be colored, but it’s best to have this done by a professional. Extensions tend to process color faster than natural hair, so the process requires a trained hand to avoid over-processing. Synthetic extensions generally can’t be dyed, but you can buy them pre-colored in various shades. 8. How are Clip-in Extensions Stored? Store them in a cool, dry place—either in their original packaging or a dedicated hair extension bag. Avoid storing them in direct sunlight, as this can cause the color to fade over time. If you’re a frequent wearer, investing in an extension hanger keeps them safe and tangle-free. 9. Do Hair Extensions Feel Heavy? Hair extensions should feel comfortable and secure when properly applied. It’s common to feel some added weight with permanent extensions at first, but most people get used to it within a few days. Opt for lightweight types if you have finer hair. 10. What Should I Avoid Doing with Extensions? Avoid excessive heat, saltwater, chlorine, and too much product buildup. Sleeping with wet extensions can cause tangling, so always dry them before bed. For semi-permanent extensions, avoid tight hairstyles that pull at the roots, as they can strain your hair. Hair extensions are a fantastic way to switch up your look instantly, whether for added length, volume, or a pop of color. Remember, each type has its own vibe and level of maintenance, so pick what fits your lifestyle and preferences best. Ready to give extensions a try? Explore our collection at Superior Hair for premium hair extensions made with 100% Remy human hair, designed to blend naturally and help you feel fabulous, no matter the look you’re going for!  

Learn more
Your Guide to Buying Extensions Online at Superior Hair Extensions

Your Guide to Buying Extensions Online at Superior Hair Extensions

Ready to unleash your inner hair goddess? Shopping for hair extensions online can feel like a hair-raising adventure (in the best way possible), but don’t worry, Superior Hair Extensions has your back! Whether you're looking to add length, volume, or just a little extra pizzazz to your locks, we’ve got everything you need to achieve your dream hair. Get ready to dive into the fabulous world of extensions and make your hair fantasies come true! 1. Start with the Right Hair Type – The Foundation of Fabulousness Before you go full glam, let’s talk about the most important part: the hair itself! Superior Hair Extensions offers the cream of the crop with 100% Remy human hair. Why do we love Remy? Because it’s the best of the best – it’s smooth, shiny, and tangle-free. Plus, you can style it just like your natural hair (hello, curls, straight locks, and beachy waves!). Pro Tip: Remy hair makes your extensions look and feel like they’re actually part of your own hair. The natural movement? Unreal. 2. Length and Volume – Because Bigger is Better (Sometimes) Next, let's talk size. Whether you want sleek, shoulder-length chic or long, flowing locks that scream "I woke up like this" (we wish), Superior Hair Extensions has it all. Our lengths range from 14 inches to 26 inches, so you can go for that subtle length boost or totally transform your hair into mermaid territory. Now, about volume: if your hair is looking a little flat, adding some thickness will take your look from meh to wow in minutes. You’ll feel like a new person when you see your hair in full, glorious volume. It's like magic – no salon visit needed! Pro Tip: If you're a first-timer, aim for a length just a bit longer than your natural hair. You'll get a natural look with a dash of extra glam. 3. Color Matching – Because We’re All About the Perfect Shade Choosing the right color is where things get really exciting! At Superior Hair Extensions, we’ve got every color under the sun (okay, maybe not EVERY color, but close enough). Whether you're rocking your natural shade, going for a trendy balayage, or trying out a bold ombre, we’ve got you covered. The best part? Color matching is a breeze. We offer a variety of shades that blend perfectly with your natural hair – and if you're unsure about picking a color, don't stress. We've made it easy to find the perfect shade for your hair goals. Simply fill up our color match form here and we’ll help you find the perfect match for your hair. Not only that, you get an exclusive 10% off on any purchase! 🎉 Pro Tip: When in doubt, darker shades blend easier than lighter ones. But don’t be afraid to try something new – that’s half the fun! 4. Choose Your Application Method – Clip-In, Tape-In, or Sew-In (Oh My!) Here comes the fun part: How do you want to wear your extensions? We have options for everyone: Clip-ins: Quick, easy, and ready to go in minutes! Want a major hair transformation for the night? Clip-ins are your best friend. They’re quick to apply, and even quicker to remove. Tape-ins: For that super-seamless, semi-permanent look, tape-ins are where it’s at. They last up to 6-8 weeks, so you can rock flawless hair for a while! Weft Extensions: If you’re after that long-lasting, full-on voluminous look, wefts are the way to go. These babies are sewn into your hair and give you that gorgeous, natural flow. Pro Tip: Clip-ins are perfect if you’re in a rush or just looking to spice things up for a special event. If you want something a little longer-lasting, tape-ins and wefts will do the trick. 5. Get the Inside Scoop – Real Reviews from Real People Want to know if Superior Hair Extensions live up to the hype? Don’t just take our word for it – check out the amazing reviews from our customers! Real feedback from people who have used our products will give you the confidence you need to make your decision. Pro Tip: Look for reviews from people with hair textures similar to yours – it’s like getting a sneak peek into how the extensions will work for you! 6. Keep It Fabulous – How to Care for Your Extensions You’ve got the extensions – now let’s keep them looking flawless! Whether you’ve gone with Remy hair or synthetic options, caring for your extensions is key to keeping them looking fresh. Gently wash with sulfate-free shampoo, condition regularly, and avoid too much heat styling (unless you’re in the mood for some curls, of course). Pro Tip: When you’re not wearing your extensions, keep them in a cool, dry place to prevent tangling. A little care goes a long way! 7. Shipping & Returns – Because Who Doesn’t Love Easy Returns? We know you’re excited to get your extensions, so let’s talk shipping. Superior Hair Extensions offers speedy delivery so you can start flaunting your new hair in no time. And if your order isn’t quite right? No worries – we’ve got an easy return and exchange policy, so you can shop with confidence. Pro Tip: Double-check the shipping and return and exchange policies before you check out – just in case you’re too excited to wait for your new hair (we get it, it’s a big moment!). 8. DIY or Call in the Professionals? Do you feel like a hair pro ready to install your extensions? Or would you rather leave it to the experts? Either way, we’ve got you covered. Clip-ins are super easy to apply on your own, but for tape-ins and wefts, we recommend booking a session with a stylist for that flawless finish. Shopping for hair extensions online is your ticket to hair transformation heaven. From choosing the right hair type and color to finding the perfect application method, we make it fun and easy to get the hair of your dreams. So, what are you waiting for? Check out our collection at Superior Hair Extensions, and let the hair magic begin! ✨  

Learn more
Your Fix-It Guide for Hair Extensions Gone Wrong

Your Fix-It Guide for Hair Extensions Gone Wrong

Here’s a fun and light-hearted troubleshooting guide for when your hair extensions go wrong! Whether you're dealing with tangling, slippage, or those pesky visible clips, don’t worry—you're not alone. Extensions add great volume, length, and style, but they can sometimes present a few challenges. Fortunately, with the right tips and tricks, you can easily solve these problems and keep your extensions looking flawless. So, if your hair's not behaving the way you want, read on for some fun, simple solutions to get things back on track! 1. Tangling Trouble Why It Happens: Extensions can get tangled when they’re exposed to humidity, or you haven’t been gentle enough when brushing. What To Do: Detangle with Care: Begin at the ends and gently work your way up, using a wide-tooth comb or your fingers to prevent tugging or damage. Add Conditioner: For extra slip, apply a leave-in conditioner or detangler spray to help ease the process Be Proactive: Regularly brush your extensions to keep them knot-free. After washing, let them air dry on a flat surface to avoid tangling. Pro Tip: Treat your extensions like your own hair—don't yank at them or they’ll rebel! 2. Slippage Scenario Why It Happens: If your clip-in extensions aren’t securely fastened or if they’re too heavy for your natural hair, they can slip out. What To Do: Reposition the Clips: Ensure you're clipping close to the roots and securing them tightly. You can even crisscross them for added hold. Backcomb for Grip: Lightly backcomb your natural hair at the roots before clipping in your extensions. This provides extra hold for the clips. Try a Hairspray: Lightly spritz hairspray on your natural hair before clipping in extensions for added grip. Pro Tip: If slippage happens on a windy day or at an event, carry a small travel-sized hairspray for quick fixes! 3. Visible Clips or Tracks Why It Happens: Sometimes clips or tape-ins show through, especially if your extensions are too thick or your hair is too fine. What To Do: Tease Your Roots: Gently tease the area where you're clipping in the extensions to give the clips something to grip onto. Blend the Layers: When adding clip-ins, make sure to leave a small layer of your natural hair on top to cover the clips. Use a Wide Section of Hair: Avoid using too thick or thin of sections when clipping in, as it can make the clips more visible. Pro Tip: If all else fails, a cute hair accessory (like a headband or clip) can hide the area until you can get home and fix it! 4. Extensions Looking Too “Fake” Why It Happens: Your extensions don’t blend well with your natural hair due to colour mismatch or texture differences. What To Do: Blend the Colour: If your extensions are a bit off in colour, you can use a semi-permanent dye to match them more closely to your natural shade. Curl or Style to Match: Create waves or curls to match the texture of your natural hair. Extensions will blend better if they share the same styling! Trim the Extensions: Sometimes, the length or shape of your extensions might not suit your natural hair’s cut. Trim them slightly to get a more natural-looking blend. Pro Tip: If you're unsure about matching colours, consult a stylist. They can often help customise your extensions to your exact shade. 5. Extension Frizz Why It Happens: Extensions can get frizzy from heat styling, humidity, or wear and tear. What To Do: Use Smoothing Products: Apply a serum or oil to smooth down frizz. Just be careful not to weigh down the extensions! Avoid Over-Styling: Excessive use of heat tools can damage your hair extensions. If you need to use them, always apply a heat protection spray or thermal protectant product. Storage is Key: When you’re not wearing them, store your extensions properly in a protective case to keep them from getting frizzy or tangled. Pro Tip: If frizz happens mid-day, a quick spritz of leave-in conditioner and a gentle finger comb can help smooth things out. 6. Clipping In Too Many Extensions Why It Happens: You might want super voluminous hair, but overloading with too many clips can make your extensions heavy and uncomfortable. What To Do: Use Fewer Clips: Go for fewer, thinner layers of extensions to avoid the "helmet head" effect. Check for Comfort: If your head feels heavy or tight, remove one or two clips to give your scalp some breathing room. Pro Tip: You can always layer clip-ins gradually for a more natural, built-up look. Go for quality over quantity! 7. The Shedding Situation Why It Happens: Just like natural hair, extensions shed over time—especially if they’ve been washed or worn a lot. What To Do: Be Gentle When Washing: Avoid over-washing or rough drying your extensions. Always wash with cool water and condition regularly. Trim Excessive Shedding: If you notice a lot of shedding, trim the ends of your extensions to prevent further tangling or split ends. Pro Tip: Keep your extensions clean but don’t overdo it. They can last way longer if you treat them gently. Hair extensions can be tricky at times, but with a little care and attention, they can be your best friend! They provide numerous options for transforming your look, whether you're aiming for extra volume, length, or a dramatic new style. Remember, the key to keeping your extensions in top shape is regular maintenance, gentle handling, and the right products. With the right approach, your extensions can last for months, giving you fabulous hair every time. So, embrace the occasional hiccup, follow these tips, and let your extensions work their magic!  

Learn more
Why I’m Still Obsessed with Tape-In Extensions After All These Years (and You Should Be Too!)

Why I’m Still Obsessed with Tape-In Extensions After All These Years (and You Should Be Too!)

If you told me a decade ago that I’d still be in love with tape-in extensions in 2024, I would’ve probably rolled my eyes. Tape-in extensions? Really? How could something so temporary ever stand the test of time? But here I am, years later, still a die-hard fan of what in my opinion is the ultimate hair hack and here's why you should be too! 1. No More Bad Hair Days! Listen, I’m all about embracing my natural hair, but let’s be real: sometimes we just need a little extra—extra length, extra volume, extra confidence! That’s where tape-ins come to the rescue. They give me luscious, voluminous locks without having to sit through hours at the salon for a permanent transformation. The best part? They feel weightless! Unlike other types of extensions that might feel heavy or uncomfortable, tape-ins lay flat to your scalp and are virtually undetectable. So no more worrying about those awkward “is that a hair extension?” moments! 2. Sleek & Seamless (Just Like Your Hair Should Be) I’ve tried it all—clip-ins, sew-ins, fusion extensions, you name it. But nothing beats the seamless blend of tape-ins. Whether I’m sporting a sleek bob or a full-on mermaid mane, tape-ins integrate so smoothly that you’d swear they’re my real hair. There’s no bulking, no weird lumps, just effortlessly chic locks. And the best part? You can actually wash and style them just like your natural hair! No fuss, no weird instructions. Just beautiful, salon-quality results at home. 3. Zero Commitment, All the Fun Okay, so I may be a little commitment-phobic when it comes to hair changes. Don’t judge! That’s why tape-ins are my go-to choice. They’re low commitment compared to permanent extensions or drastic cuts. I can enjoy long, voluminous hair one month, and go back to my sleek pixie the next. No worries about long-term damage either. BONUS: Tape-ins are easily removed and reapplied, which means you can refresh your look whenever you want—without waiting for the next season to roll around. 4. Versatility is Key One of the things I love about tape-ins is how customizable they are. Want to go from short and chic to long and luxurious in a matter of hours? Done. Want to add some volume and thickness to your existing hair without changing the length? Done and done! Tape-ins come in all lengths, textures, and colors to match your vibe. And if you're into experimenting with different looks, you can always try some fun highlights or ombre effects—just be sure to go to a pro to keep things seamless! 5. Perfect for Busy Lives If you’re anything like me, that means you’re always on the go. Between work, events, and (let’s be honest) the endless social media scrolls that need to be perfected, the last thing you need is hair that takes hours to manage. Tape-in extensions are easy to maintain and stay in place for weeks. That means I can have a fab hair day every day, without spending hours on it. 6. Great for Anyone Who Loves Healthy Hair I used to worry that extensions might damage my hair, but after trying tape-ins, my mind was put at ease. If installed and removed properly by a professional, tape-ins won’t cause damage to your natural hair. Plus, the adhesive used is much gentler on your strands than traditional methods like keratin bonds or clips. For anyone who wants to add some extra glamor without sacrificing hair health, tape-ins are a total game-changer. 7. Incredible Value for Money Let’s talk about value, shall we? While the initial investment might feel like a splurge, in the long run, tape-ins are totally worth it. Think about it: fewer trips to the salon for upkeep, no more buying bulky clip-in sets that barely last a season, and the flexibility to change your look as often as you like. Plus, with the right aftercare, your tape-ins can last several months with minimal maintenance. In Conclusion… After all these years, I’m still totally obsessed with my tape-in extensions. They’re versatile, low-maintenance, and the perfect solution for anyone who wants to up their hair game without the commitment. What about you? Have you tried tape-ins yet, or are you still on the fence? If you’ve been thinking about giving them a try, this is your sign to go for it. I just love the ultra seamless tape-ins by Superior Hair. They're absolutely flawless, easy to install, and blend beautifully. Once you experience how effortless and natural they look, you’ll be hooked! Now go ahead and treat yourself to the hair of your dreams ‘cause girl, you deserve it! 💁‍♀️✨  

Learn more
Hair Extensions Quiz: Find Your Perfect Match!

Hair Extensions Quiz: Find Your Perfect Match!

  Are you ready to discover which type of hair extensions are best for your hair goals and lifestyle? Take this fun, simple quiz to find out! Whether you're looking for volume, length, or a little bit of both, we’ll help you discover the best extensions for your unique needs. 1. What’s your main hair goal? A) I want to add volume and thickness to my natural hair.B) I’m looking for long, luscious locks to change up my look.C) I need a quick way to add length and fullness for a special event.D) I want a versatile option that I can wear every day and switch up easily. 2. How much time do you want to spend maintaining your extensions? A) Minimal upkeep is a must – I want something easy to maintain.B) I don’t mind a little maintenance, I just want beautiful long hair!C) I’m okay with some upkeep, as long as the results are stunning for my event.D) I want something that I can clip in and out easily – I don’t want permanent options. 3. What’s your hair type? A) Fine or thinning hair.B) Medium to thick hair.C) Fine or medium hair (but I need something temporary).D) Thick, curly, or textured hair. 4. How frequently do you change up your hairstyle? A) I prefer low-maintenance, classic styles.B) I love experimenting with new looks!C) I only change it up for special occasions.D) I like variety but need something I can manage daily. 5. What’s your budget for hair extensions? A) I want something affordable but effective for my needs.B) I’m willing to splurge on high-quality extensions that last.C) Budget-friendly is key, especially for a one-time event.D) I’m flexible with my budget for something that gives me daily flexibility. 6. How do you feel about the installation process? A) I prefer something that’s easy to apply and remove on my own.B) I’m happy to visit a professional salon to get them applied.C) I want something that’s quick to apply at home, no salon visit needed.D) I want something that can stay in for a while without requiring constant touch-ups. Results: Mostly A’s: Tape-In Extensions – Quick, easy, and comfortable! Tape-Ins add volume and thickness with minimal upkeep, perfect for fine hair that needs a boost. They can be done at home or professionally applied. Mostly B’s: I-Tip Extensions – For those looking to achieve long, stunning locks, I-Tips are semi-permanent extensions that offer a natural, seamless look. Expect professional installation and a longer-term solution to hair length and volume. Mostly C’s: Clip-In Extensions – Perfect for an event or a temporary style change! Clip-ins are easy to apply and remove, giving you length and volume for special occasions without the commitment. Mostly D’s: Microbead or Sew-In Extensions – Microbeads are ideal for thick, curly, or textured hair that needs something more permanent and durable. They can be styled in various ways and offer a flexible, natural look that lasts for months. Now that you know which type of extension matches your goals and lifestyle, you’re one step closer to achieving your dream hair! Try Superior Hair Extensions for a smooth, natural look that will take your hair to the next level!

Learn more
Get Instant Glam: The Ultimate Guide to Rocking Ponytail Extensions 🌟

Get Instant Glam: The Ultimate Guide to Rocking Ponytail Extensions 🌟

Let’s talk ponytails: they’re not just a quick fix for a lazy hair day—they’re an instant way to turn heads! And with ponytail extensions, you can add length, volume, and drama without spending hours in front of the mirror. Whether you’re new to the world of ponytail extensions or looking for some fresh inspo, this guide has you covered! Ponytail Extensions 101: Why You Need Them in Your Life First things first: why ponytail extensions? For one, they’re perfect for adding fullness and length. Whether you’re dreaming of a sleek, waist-length ponytail or a bouncy, high-volume style, ponytail extensions make it easy to switch things up without the commitment. You get that just-left-the-salon look in a fraction of the time, and with options in every color and texture, they’re the secret weapon for anyone looking to instantly boost their style and make a statement. How to Choose the Perfect Ponytail Extension Choosing the right ponytail extension is key to nailing the look. Here are some top tips: Length Matters: Go short and sweet with a shoulder-length pony or dial up the drama with one that falls to your waist or beyond. Color Match: Make sure to find a shade close to your natural hair color—or mix it up with a bold contrast if you’re in the mood to experiment. Texture Choices: Whether you’re going for a slick, straight look or want beachy waves, find a texture that matches your vibe (or switch it up depending on the day!). Attachment Type: Most extensions come with a wrap-around section for that flawless, natural look, but make sure it’s secure and comfortable enough for all-day wear. Applying Your Ponytail Extension Like a Pro Applying a ponytail extension might sound intimidating, but it’s surprisingly simple with a little practice: Step 1: Start with your natural hair in a ponytail—high, low, or mid-height, depending on the look you want. Step 2: Attach the extension securely around your ponytail base, using any clips or fastenings it comes with. Step 3: Take the wrap-around section of the extension and secure it around your natural ponytail to hide any clips and create a seamless finish. Step 4: Secure with bobby pins if needed, and give it a gentle tug for extra volume or fluff it up if you’re going for a tousled look. Voila! Instant glam. ✨ Styling Ideas: Let Your Ponytail Take Center Stage Not sure how to style your new ponytail? Here are some killer ideas to take your ponytail game to the next level: The Sleek, High Ponytail: Channeling those red-carpet vibes, this look is all about sophistication. Use a bit of styling gel on your natural hair before attaching the extension for a polished, runway-ready finish. Messy, Boho Ponytail: Perfect for daytime outings or festivals, this look is effortless and relaxed. Use a wavy extension and pull a few face-framing strands for a touch of romance.                         Low, Dramatic Ponytail: Think sophisticated and elegant. A low ponytail with a long extension pairs perfectly with a little black dress or even an office outfit. Maintenance Tips to Keep Your Hair Extensions Looking Fresh Ponytail extensions are all about convenience, but they do need a bit of TLC to stay looking their best: Brushing: Use a wide-tooth comb or a brush specifically made for hair extensions to avoid tangles. Washing: A gentle wash every few wears will keep your extensions looking fresh. Remember to only use sulfate-free shampoo and a hydrating conditioner. Storage: When not in use, store your extensions in a protective bag to keep them clean and tangle-free. Embrace the Confidence Boost! One of the best things about ponytail extensions? The confidence boost. There’s just something about having that extra length and volume that makes you feel unstoppable. Plus, they’re versatile enough to suit any occasion—be it a workout session, a coffee date, or a glamorous evening out. Final Thoughts: Ponytail Extensions for the Win! With ponytail extensions, you can switch up your style whenever the mood strikes. From sleek and sophisticated to messy and boho-chic, they’re the ultimate style hack for anyone wanting to take their hair game to the next level. For high-quality options, try ponytail extensions from Superior Hair—you’ll love the boost in volume and style. So go ahead, rock that ponytail with confidence and enjoy the compliments that follow! 🖤💃  

Learn more
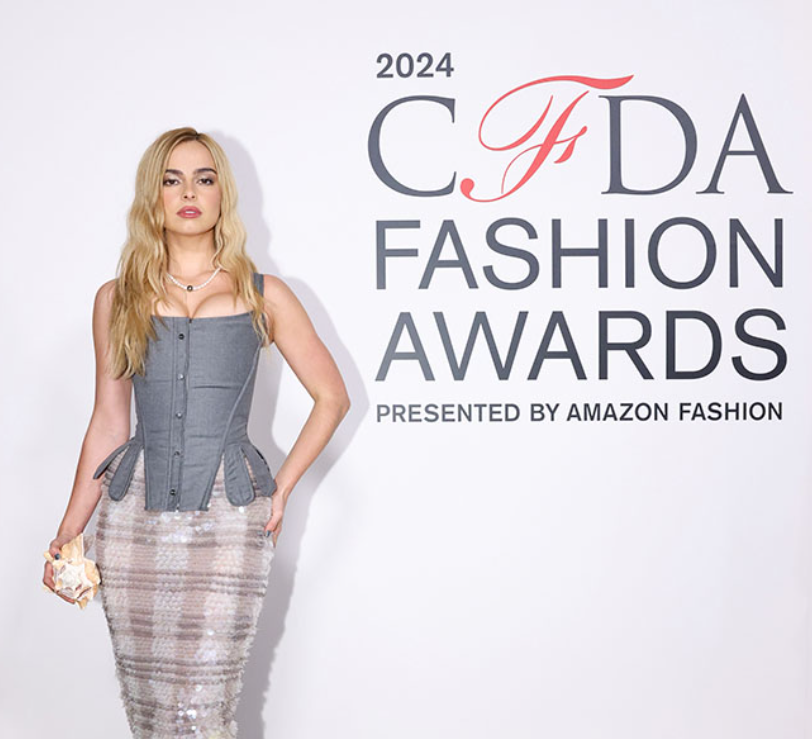
Glamorous Hairstyles That Shone at the 2024 CFDA Fashion Awards

Glamorous Hairstyles That Shone at the 2024 CFDA Fashion Awards

The 2024 CFDA (The Council of Fashion Designers of America, Inc.) Fashion Awards, held on October 28 at the American Museum of Natural History, not only celebrated the crème de la crème of fashion but also showcased a stunning array of hairstyles that turned heads on the red carpet. Here are some of the most notable yet classic looks from the 2024 CFDA Fashion Awards that are sure to set trends for every season: 1. Kylie Jenner's Sleek Sophistication Kylie Jenner made a bold statement with her sleek, slicked-back hairstyle, perfectly complementing her striking Jean Paul Gaultier couture gown. This polished look highlighted her facial features and allowed the dramatic lines of her outfit to take center stage​. The simplicity of her hairstyle brought an air of sophistication, making it a great option for red carpet events. Photo: Getty 2. Blake Lively’s Romantic Waves Blake Lively brought back classic glamor with her soft, cascading waves styled with a side part which added a touch of romance to her all white ensemble. This timeless hairstyle not only exudes elegance but also framed her face beautifully, showcasing her features while maintaining an effortlessly chic vibe​. Waves are always a great choice for adding movement and dimension, making them versatile for various occasions. Photo: Getty 3. Ciara’s High Volume Updo Ciara wowed the crowd with a bold, high volume updo. This sophisticated yet playful hairstyle exemplified how an updo can elevate any look. High-volume hairstyles are perfect for making a statement and drawing attention​. .Photo: Getty 4. Aweng Chuol’s Edgy Pixie Aweng Chuol opted for an edgy pixie cut that showcased her bold personality. This daring choice is not only chic but also emphasizes strong facial features, making it an inspiring option for those looking to make a statement with shorter hair. . Photo: Jamie McCarthy/WireImage 5. Katie Holmes Low Messy Bun Katie Holmes made a playful impression with her low, messy bun. Holmes’s bun was the epitome of casual elegance, embodying a relaxed yet polished vibe. This hairstyle is all about looking effortlessly put together. The combination of the bun with dangling ruby red earrings added a touch of playful elegance to her overall look, proving that simplicity can be stunning on the red carpet. Photo: Getty 6. Joan Smalls Sleek Middle-Parted Locks .Joan Smalls turned heads with her long, straight hair styled in a sleek middle part. The simplicity of the straight, parted look adds an air of sophistication and timelessness, making it a fantastic choice for various occasions. This hairstyle is easy to maintain while still making a significant impact, embodying the essence of modern elegance​. Photo: Getty As fashion evolves, so do hair trends, making events like the CFDA Fashion Awards key indicators of what’s next in beauty. This year's standout hairstyles inspire future seasons, underscoring the importance of creativity in hairstyling alongside fashion. These styles will likely influence trends and encourage individuals to experiment with their own looks. We saw that the awards celebrated not only established designers but advanced hairstyling, reinforcing its crucial role in fashion and personal identity.   

Learn more
The Kardashian Sisters’ Secret to Perfect Mermaid Waves: Get the Look!

The Kardashian Sisters’ Secret to Perfect Mermaid Waves: Get the Look!

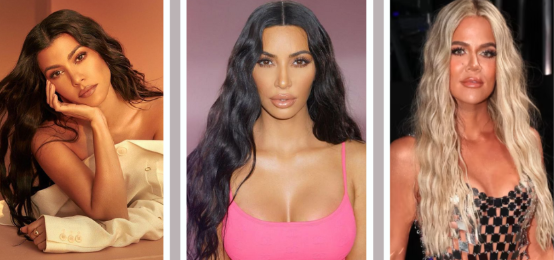
The Kardashian sisters are known for setting trends in the world of fashion and beauty, and their famous mermaid waves are no exception. Whether it’s Kim's long, glossy waves, Khloé's tousled beachy locks, or Kendall’s subtle waves, the Kardashian-Jenner clan has perfected this effortless yet glamorous style that channels serious "mermaid energy." Let’s dive into how each sister owns the mermaid wave trend and how you can replicate their looks! Kim Kardashian: Sleek and Polished Mermaid Waves Kim Kardashian often rocks mermaid waves with a sleek and polished finish, giving off a sophisticated and ultra-glam look. Her waves are usually tighter at the roots and looser towards the ends, creating a waterfall effect. Here’s how to channel Kim’s signature style: Tools & Technique: Start with a deep-conditioning treatment for that signature Kim K shine. Use a 1-inch curling iron and curl sections of hair starting mid-length, working your way down. For extra gloss, finish with a shine spray to get that sleek, reflective look. Extensions for Extra Volume: To get that long, full Kim K hair, clip-in extensions in a shade that matches your own. This will create her iconic look with that added Kardashian-level volume. Photo: Kim Kardashian/Instagram Khloé Kardashian: Tousled and Textured Beachy Waves Khloé's mermaid waves are all about that relaxed, beachy vibe. She often opts for a tousled, slightly undone style that looks effortlessly chic. Perfect for those wanting a more natural, carefree look! Tools & Technique: Start with a texturizing spray or sea salt spray to add body and grip to the hair. Wrap small sections around a curling wand, leaving out the ends for a more casual feel. Once the curls have cooled, rake through with your fingers and finish with a light-hold hairspray. Styling Tip: Khloé’s waves look fantastic with a center part, which helps frame the face and gives a more bohemian vibe to her style. Photo: Khloe Kardashian/Instagram Kourtney Kardashian: Retro-Chic Mermaid Waves Kourtney Kardashian brings her own twist to mermaid waves with a chic, retro-inspired look. Her waves are often more controlled, giving them a vintage flair that’s perfect for a timeless, elegant look. Tools & Technique: Start with a lightweight mousse to create a smooth base. Use a 1-inch curling iron or flat iron to create waves that are soft yet structured, giving them a classic shape. Kourtney’s waves are often brushed out slightly for a softer, Old Hollywood feel. Styling Tip: Kourtney’s mermaid waves look best with a side part, enhancing her vintage-inspired look. A light spritz of flexible hold hairspray will keep the waves intact without looking stiff. Photo: Kourtney Kardashian/Instagram Kylie Jenner: Bold Volume and High-Impact Waves Kylie’s approach to mermaid waves brings the drama! She often opts for voluminous, defined waves that make a statement. Her waves are bold, bouncy, and full, perfect for adding that Kardashian flair to any look. Tools & Technique: To achieve Kylie’s look, use a 1.5-inch barrel curling iron for looser, bigger curls. Curl from the roots to the ends to maintain volume throughout, then gently shake out the curls for added body. Finish with a volumizing spray to keep everything lifted. Extensions for Full Glam: Kylie often uses extensions for added length and volume. Clip-in extensions that match your natural shade will give you those perfect waves. Consider extensions in longer lengths to mimic Kylie’s mermaid-inspired style. Photo: Splash News Kendall Jenner: Effortless Minimal Waves Kendall goes for more understated, subtle waves that have a modern edge. Her look is often classy and unfussy, with a focus on healthy, glossy hair rather than dramatic volume. Tools & Technique: For Kendall’s minimal waves, prep hair with a lightweight leave-in conditioner. Use a flat iron to create soft, barely-there waves, bending the hair slightly as you move down each section. Finish with a light texturizing spray for added movement without extra hold. Styling Tip: Keep it natural—Kendall’s waves work best with shorter lengths or medium-length hair. Her effortless, lived-in look is all about embracing natural beauty. Photo: Getty How to Get Kardashian-Worthy Mermaid Waves at Home To achieve Kardashian-inspired mermaid waves, here are some essentials: Invest in Quality Extensions: If you want that Kardashian-level volume and length, extensions are key. Look for high-quality, color-matching clip-ins that blend seamlessly. Shine is Everything: Healthy, glossy hair is the foundation of the Kardashian look. Regular conditioning treatments and lightweight shine sprays are essential to recreate that flawless finish. Perfect Your Wave Technique: Whether you prefer Kim’s sleek finish, Khloé’s beachy look, or Kylie’s high volume, the right technique makes all the difference. With these tips, you’re ready to channel your inner Kardashian and slay the mermaid wave trend with style! For that extra volume and length, shop high-quality hair extensions from Superior Hair and bring Kardashian-worthy waves to life. Achieve the perfect, glamorous look that turns heads everywhere you go!  

Learn more